
A Technical Guide to Using Salesforce Documents Tab as an Integration Source Repository
A lot of our clients do integrations with flat files sitting on an SFTP or FTP server where an ETL solution, in this use case example, Actian, goes and grabs the file to use as a source during the integration.
This post provides a method for doing the same thing but using the Documents Tab in Salesforce as a repository for the file as opposed to the SFTP and using Actian v9 to transform that Document into a useable text document for integration purposes. With that said, this blog post is really geared towards developers or integration specialists using Actian who are looking for a different way to allow end users to manage documents that are being used for integration purposes. Who would have thought that the Documents tab had so much utility? I’m convinced it’s never going away but that’s for another blog post.
Writing the Query to Get the Correct File
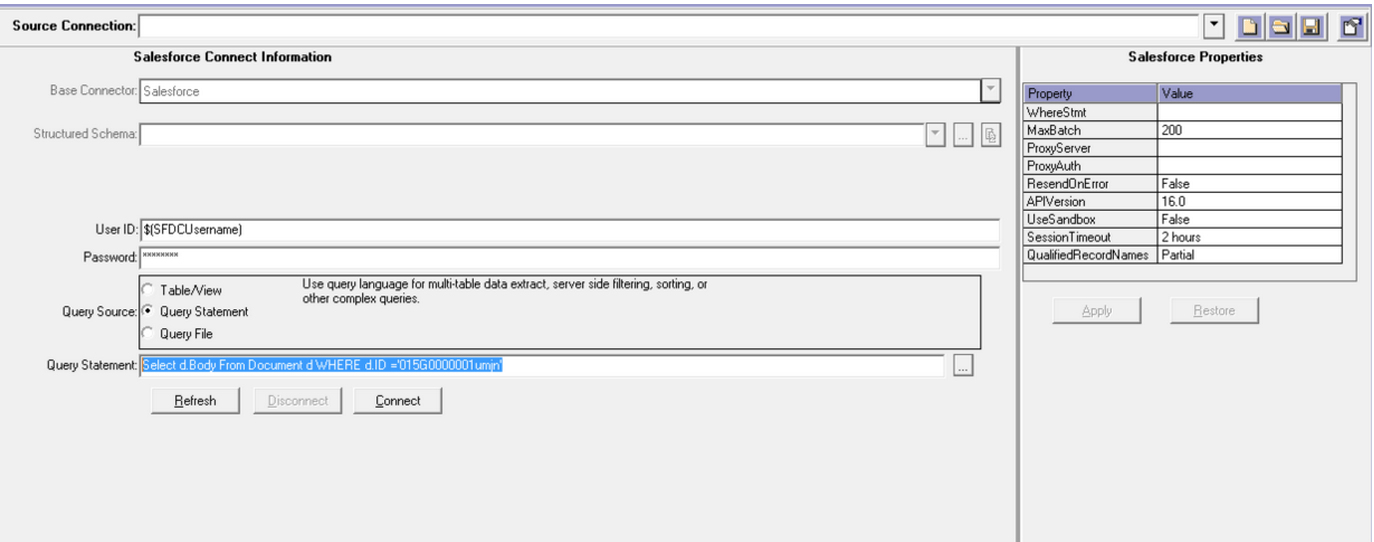
This work is done in a Map so no need to pull out the FTP Queue or Sessions. Since the work is done in the Map it is necessary to write a query in order to pull the correct Document from Salesforce to use. The only field that you actually need from the Document is it’s Body. The below example pulls the Body of a specific Document identified by it’s Salesforce ID in a simple SOQL query (a best practice would be to “macro out” the value of this ID as to not hardcode anything).
Select d.Body From Document d WHERE d.ID ='015G0000001umjn'
Settings on the Target Connection Tab
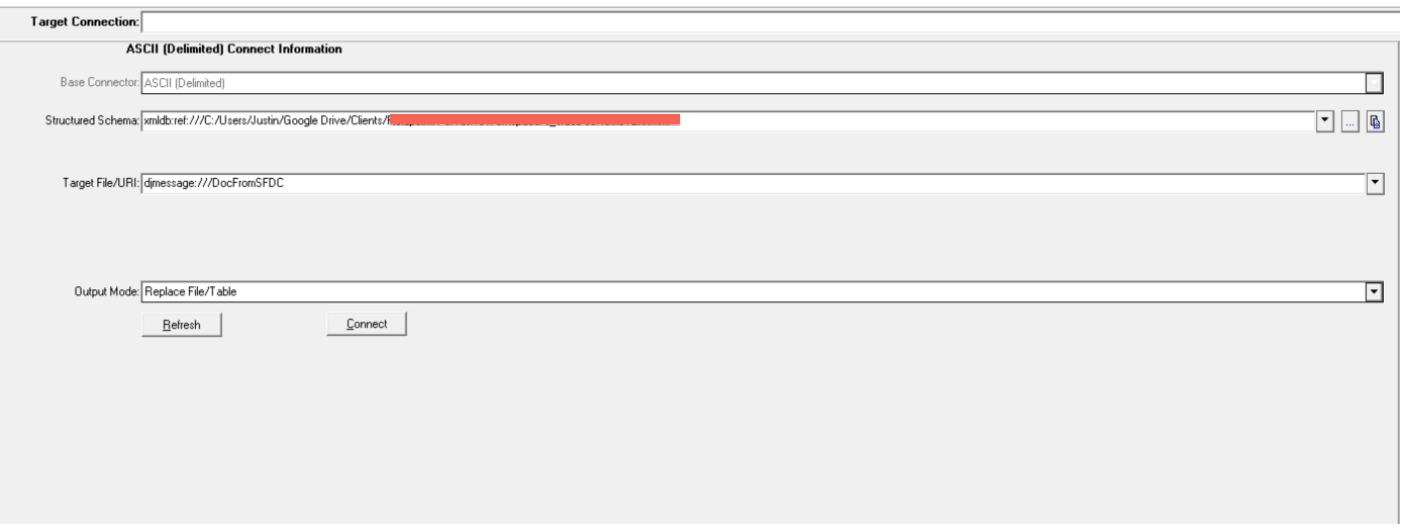
In this scenario you will ultimately want to write out the file to a DJMessage but it is good to set the Base Connector to ASCII (Delimited) and write the file out first to your desktop as a .csv file - just so that you can test and make sure the file is exactly the same as the one that came out of Salesforce. You won’t be able to test this until you do the Map All step and run the process because you can’t really test the contents of a DJMessage.
The key in this entire process though is the ASCII (Delimited) Properties on the Target Connection tab. See screenshot below for how these should be set.
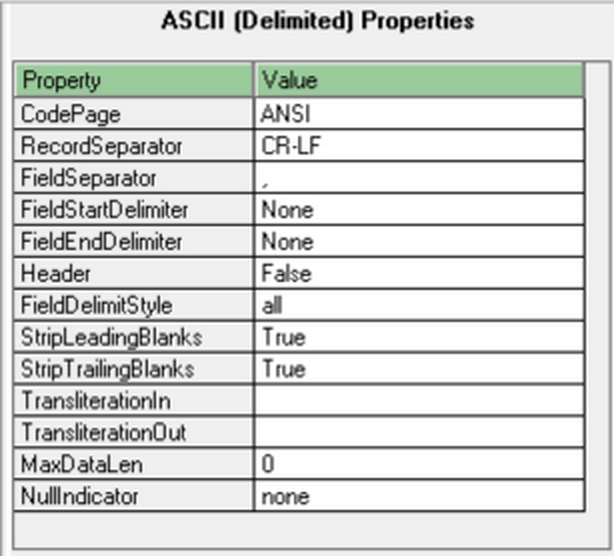
Once you have set the Target File/URI to a specified location on your desktop with a .csv file type it’s time to go to the Map All tab. We will return to the Target Connection tab after we run this once to change a few settings including the Target File/URI as well as the Structured Schema.
The Map All Tab
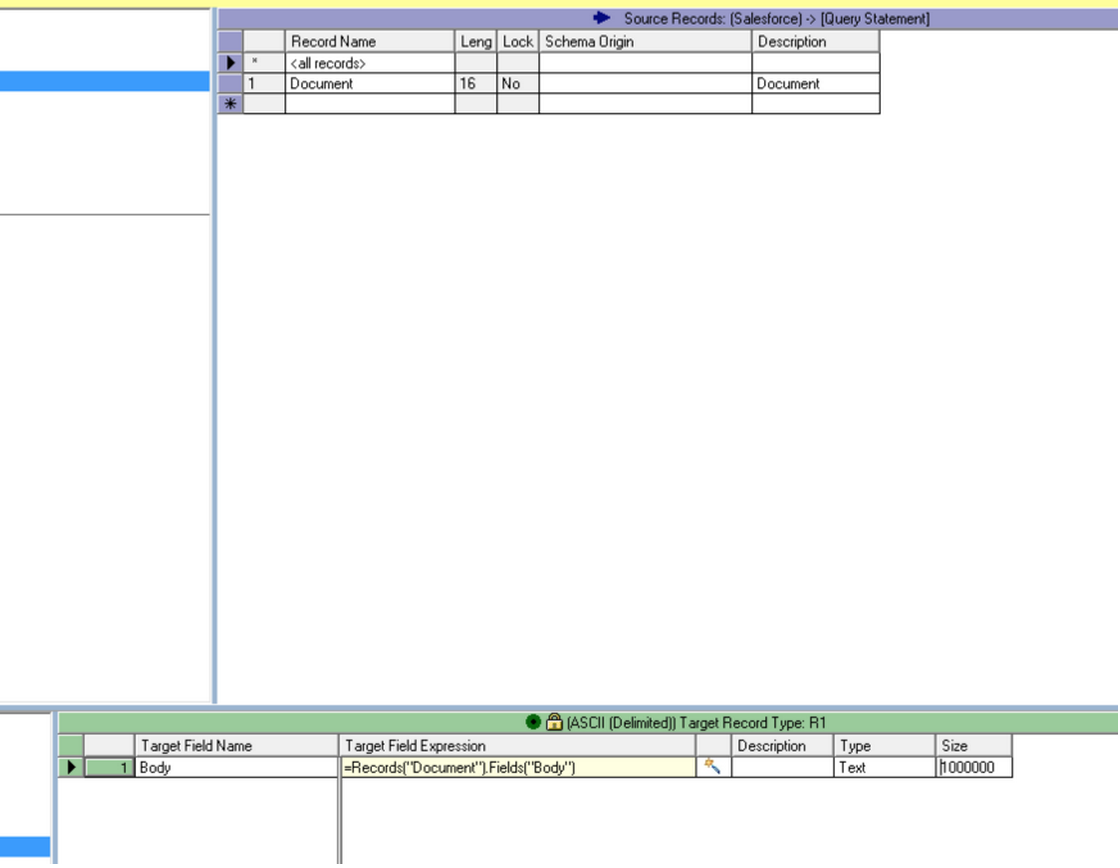
You will only see one field in the Source Records section - it will be the Body of the Document you retrieved from Salesforce in your earlier query.
Create a field in the Target section and just call it Body (or really whatever you want) and set the type to text and the size to something large - I used 1,000,000 as my size but really this just needs to be larger than the file that you are actually pulling.
Map the Body field in the Source to the Body Field in the Target as seen in the screenshot below.
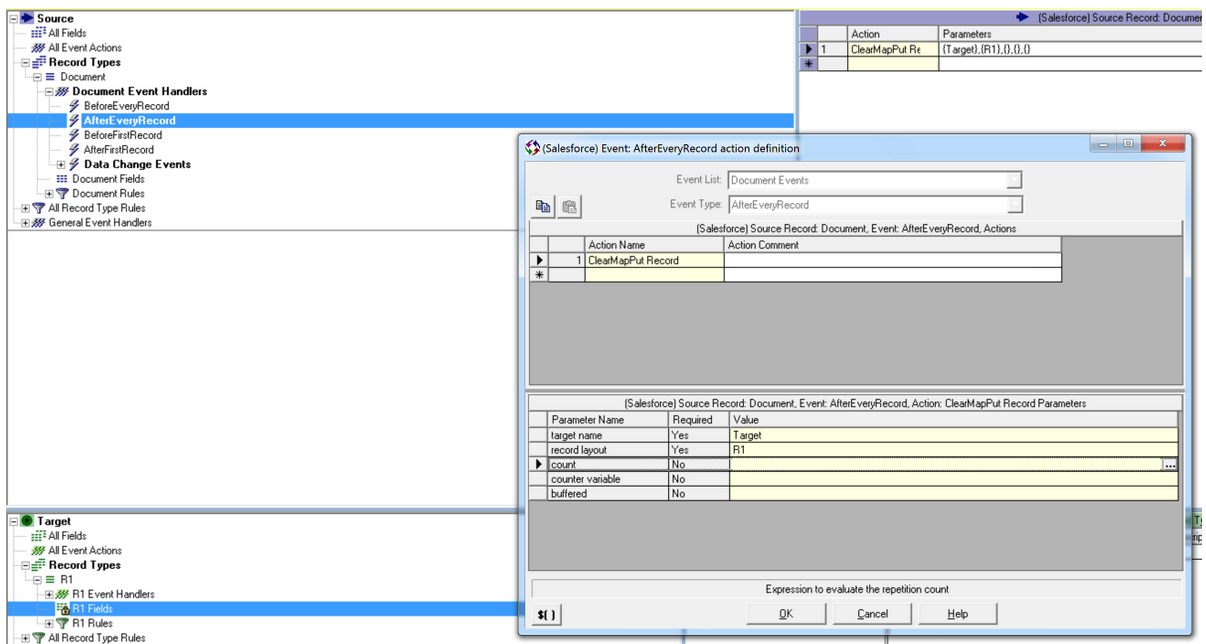
Once you’ve done this the only event handler that is necessary is an AfterEveryRecord ClearMapPut Record.
You should at this point run your map once and make sure that the Document File that is in Salesforce is exactly the same as the file that is outputted as part of this Map. A .csv should end up on your desktop or wherever you set as the Target for the output.
Setting the Target as a DJ Message
Once the file is verified go back to your Target Connection tab and perform 2 actions:
Replace the Target File/URI: with the name of a DJMessage (you’ll need to define the DJMessage in a scripting step as part of the overall process).
Create a Structured Schema - this is a very simple step now that you’ve already done the mapping work which is really just 1 field so just click on the Build Schema ellipses (button) next to the Structured Schema line on the tab and it will build it for you, just click save and save it as whatever you’d like.
Map The Message
Now that you have your data in the form of a DJMessage you can use the data stored in the message as the Source of any further maps in your integration. This is a simple use case for allowing a very non-technical user to get around having to manually FTP files onto a server to perform an integration. The user can simply use the “Replace Document” button on the Document record inside of Salesforce and upload a new version whenever they want. The integration will pick up the new version of the file and perform whatever actions you’ve defined in subsequent mapping steps.
Please feel free to comment below, on our Facebook page, or directly at me on Twitter @JustEdelstein.