Optimize Omni-Channel Routing Using Waterfall Flow
The issue: Initial chat setup didn’t allow for prioritized routing
Global companies, need to offer multiple Customer Service opportunities to their customers. Live Chat is a popular option for customers these days. The benefits of offering Live Chat include; shorter (or zero) hold times, convenience for customers, being able to save a record of the chat, and allowing for agent multitasking.
For this particular client, at a previous employer, Live Chat as a customer service channel from three places: the company's main web page, the User Community, and the Partner Portal.
Moving forward in this post, “we” refers to the business systems team I worked on at the time.
When chats come in from the web page or the User Community, they currently get routed to a queue that contains Tier 1 agents. However, chats are often missed at specific times of the day (for example, during the Tier 1 agent meeting). The Service department wanted the routing prioritized being sent to Tier 1 > Tier 2 > Tier 3.
When chats come in from the Partner Portal, chats route to a queue with Tier 2 agents and Tier 3 agents. Routing should be prioritized being sent to Tier 2 > Tier 3.
Use queues, presence configuration, and an Omni-Channel flow
We created a parent queue (All Chats Queue) so the chat buttons recognize when agents from any tier are online and available to accept chats. Along with creating the queue, we added all agents as members of this queue.
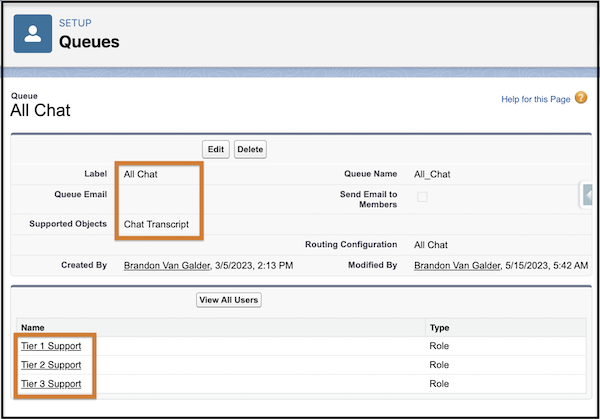
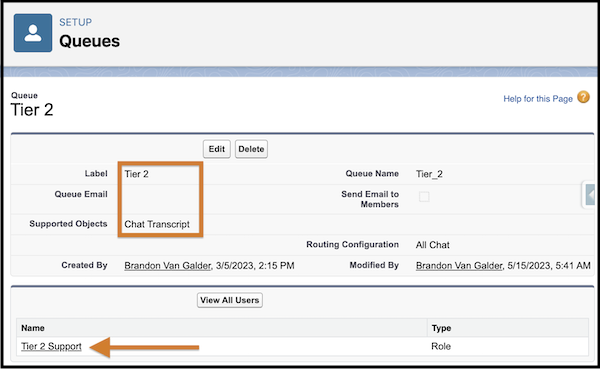
We created queues for each tier to route chats to (Tier 1, Tier 2, Tier 3) to replace the current queues that were used to allow for a smooth transition to the waterfall method. Again, we added each agent as a member to the specific queue aligned with their role (Tier 1, Tier 2, Tier 3).
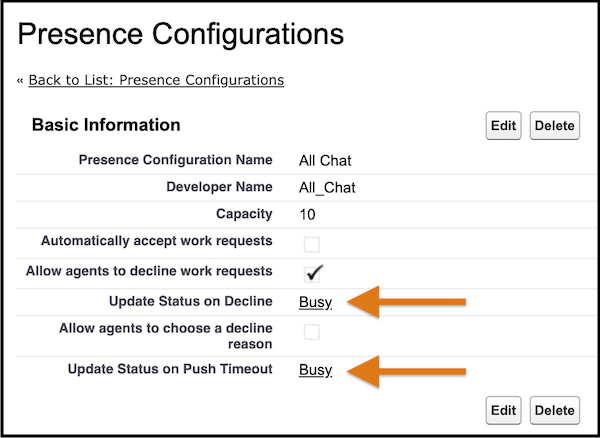
In Presence Configurations for Chat - Standard Agent (all agents assigned to this), we set Update Status on Push Time-Out to ‘Busy’ and Update Status on Decline to ‘Busy’.
Next, we created an Omni-Channel flow to route chats to appropriate queues based on where they came from according to our specific business requirements.
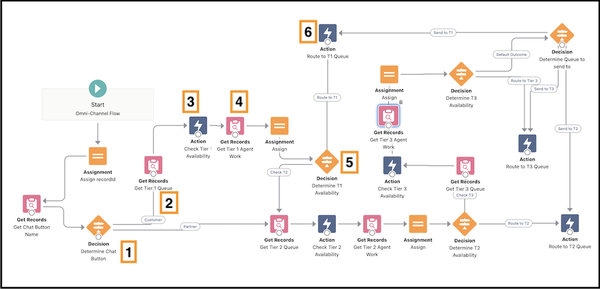
After the assignment of the record Id variable and getting the name of the chat button the chat originated from in the first two elements of the flow, we created the flow following these steps.
We used a Decision element to determine which path to send the chat down first (Customer Service to Tier 1 or Partner to Tier 2) to meet our business use case.
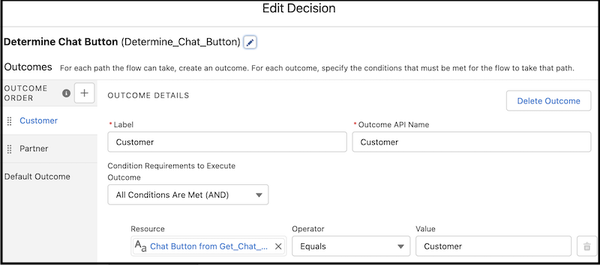
The following elements are used multiple times in the Omni-Channel flow, once for each different queue we could potentially route chats to.
In order to follow best practices, we used a Get Records element named ‘Get Tier 1 Queue’ to get the Tier 1 Queue ID for element #4 by looking for a specific Developer Name and Type = Queue.
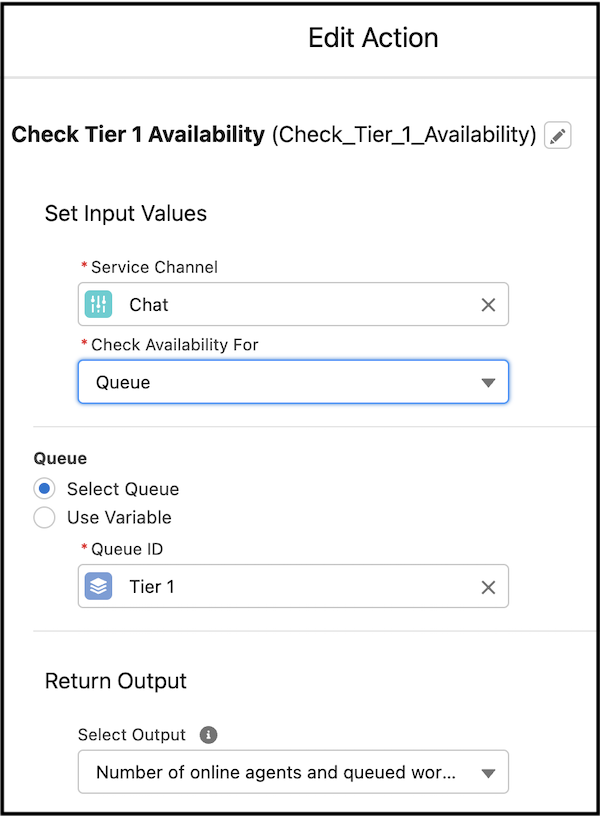
Using the Check Availability for Routing action, we checked to see if any agents are in the specific queue (will show agents with no chats all the way to full capacity as available).
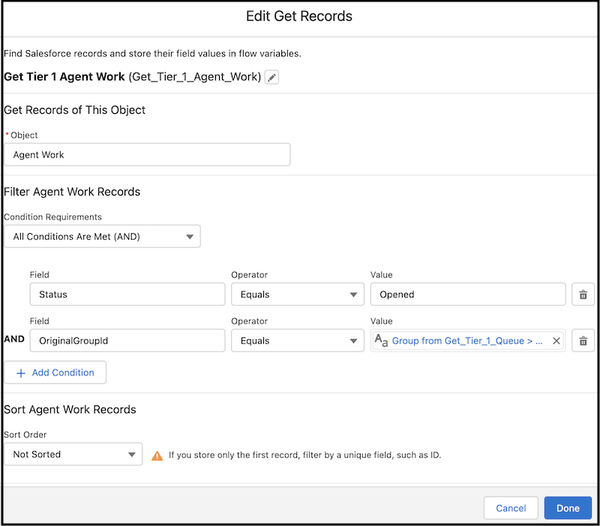
Then, using a Get Records element, we ‘Get Tier 1 Agent Work’ to find out how many chats are being worked on by Tier 1 agents (Status = Opened). It will be assigned to a variable in the next element (varT1Count).
We then used a Decision element with a formula to determine if there’s any availability in Tier 1 for chats to be routed there. The formula we used is based on each agent being able to receive two chats. If the formula = True, send to #6, and if False, send to the next tier for evaluation.
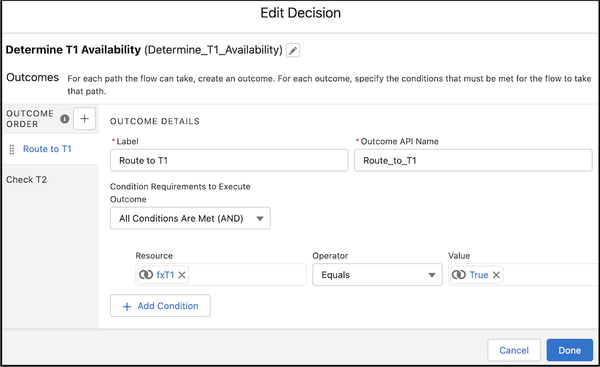
Here’s the formula we used for a boolean data type: ({!Tier_1_Availability.onlineAgentsCount}*2)>{!varT1Count}
Example: If there are two Tier 1 agents and three chats being worked on in Tier 1, the formula would calculate as:
(2 x 2) > 3 = True
If there are two Tier 1 agents and four chats being worked on in Tier 1, the formula would calculate as:
(2 x 2) > 4 = False
Next, we used an Action element called ‘Route Work’ to route chats to the Tier 1 Queue.
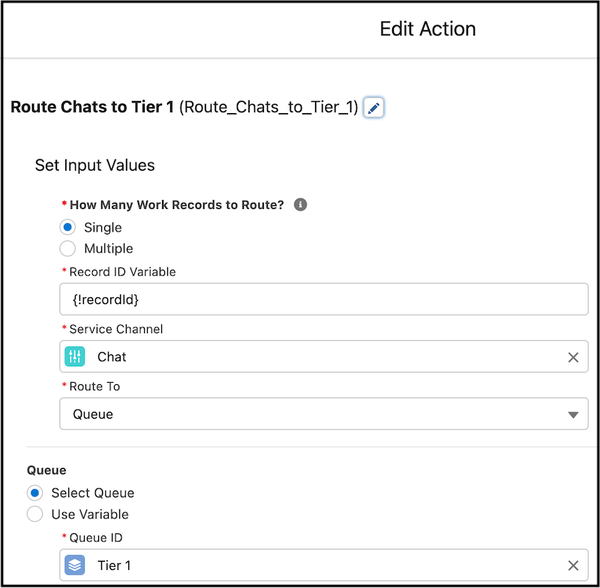
At this point, chats are now routed to the correct queue upon creation, but if an agent declines or times out, they would stay in the same queue (if agents are available) and potentially cancel out (if no agents are available).
Re-route the chat if declined, timed out, or cancelled
After a few unsuccessful attempts to re-route using Chat Transcript Events (initially worked but found out these could take up to 24 hours to be created) and then learning about Pending Service Routings (never worked with this!), we found the answer in this Help article.
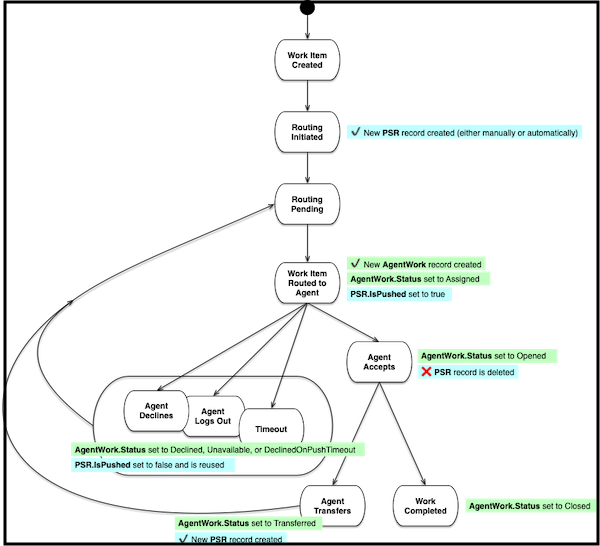
Agent Work!
We used a record-triggered flow to re-route chats through the Chat Waterfall flow again.
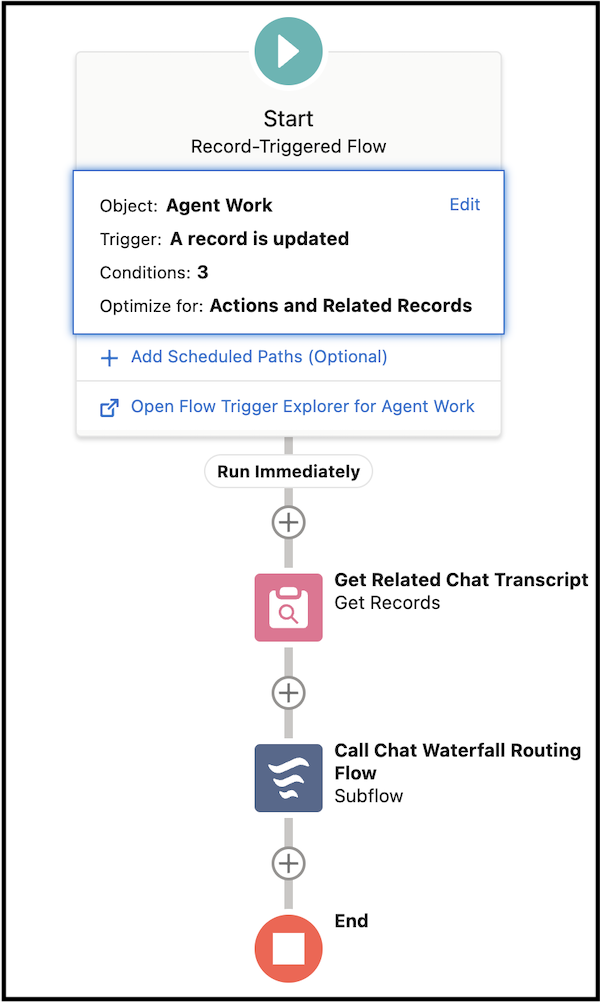
This flow is triggered when on the Agent Work object whenever the Status = Declined, Unavailable, or DeclineOnPushTimeout. The functionality of rerouting on Decline and Timeout stopped working but still works on canceled (if agent is disconnected or updates their Presence Status to ‘Busy’ or ‘Offline’).
When triggered, a Get Records element is used to look up the related Chat Transcript (Work Item ID = Chat Transcript ID in our use case). Lastly, we called the Chat Waterfall flow (using a subflow action) with the Chat Transcript ID sent as the input into a variable.
Have you made any Omni-Channel flows before or do you have any other Omni-Channel routing tips? Tell me on the Salesforce Trailblazer Community @Brandon Van Galder or find me on LinkedIn.
